12 Small Open Plan Kitchen Layouts That Are Genuinely Life-Changing
I used to think that having a small open-plan kitchen meant I was destined to live in a state of permanent clutter, tripping over barstools while trying to reach the toaster. Honestly, the mistake I made for years was trying to cram a “standard” kitchen layout into a space that needed a much smarter, more tailored approach. I was obsessed with having a massive island I didn’t have room for, and it just made the whole living area feel cramped and chaotic. Then, I discovered that the secret isn’t about having more square footage—it’s about how you pivot the flow. Once you nail the layout, the difference is unreal; the space suddenly feels double its actual size.
✨ Before You Start: 12 Small Open Plan Kitchen Layouts That Are Genuinely Life-Changing—No Seriously Mindset
The Strategic Peninsula Pivot
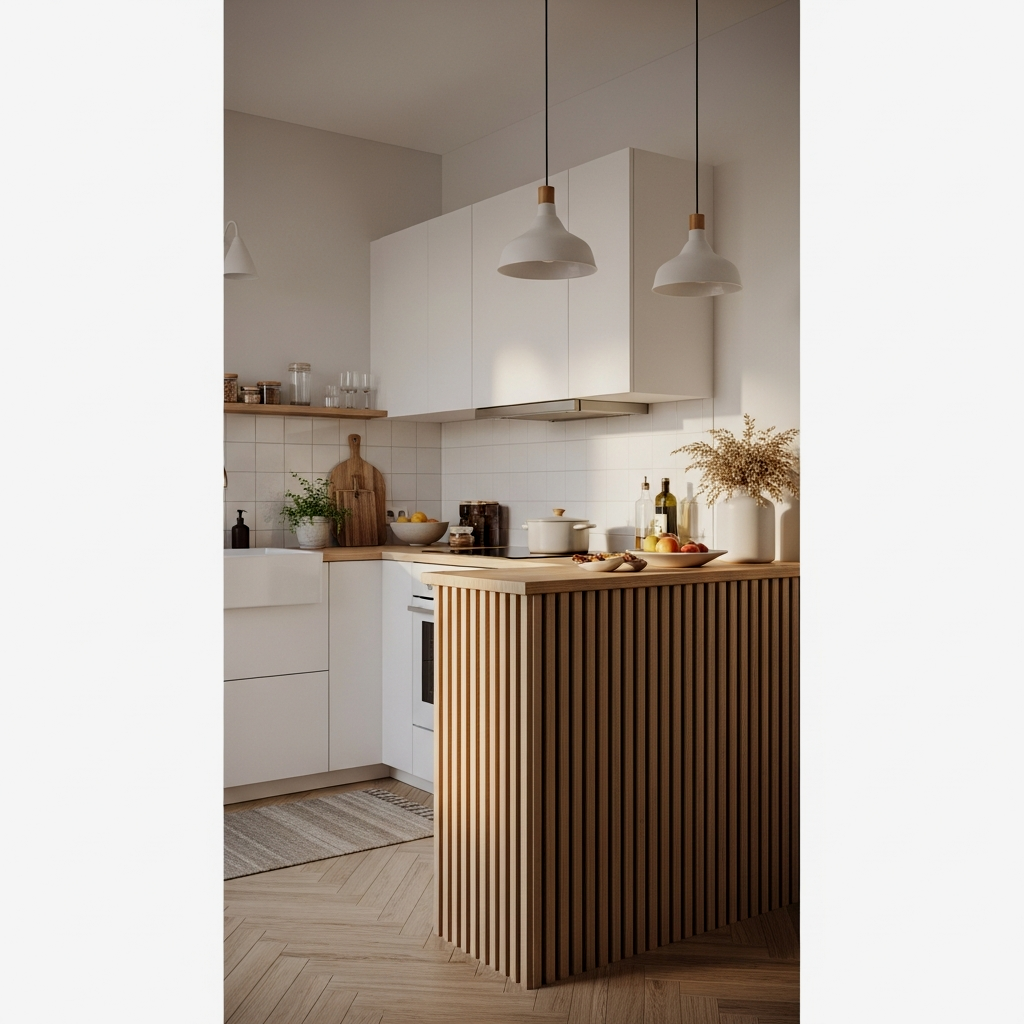
If you don’t have the clearance for a full island, the peninsula is your best friend. I’m genuinely obsessed with how a peninsula creates a clear “U-shape” work zone while acting as a natural room divider. It keeps guests out of your cooking path but lets them hover nearby with a glass of wine. For a high-end look, try wrapping the waterfall edge in a material like honed Carrara marble. If you’re on a budget, use a butcher block top from IKEA and stain it a rich walnut to add warmth against white cabinets.
Choose backless stools like the West Elm ‘Alden’ bar stools; they tuck completely under the peninsula, keeping your sightlines clear and the floor space open.
The Seamless Recessed Alcove
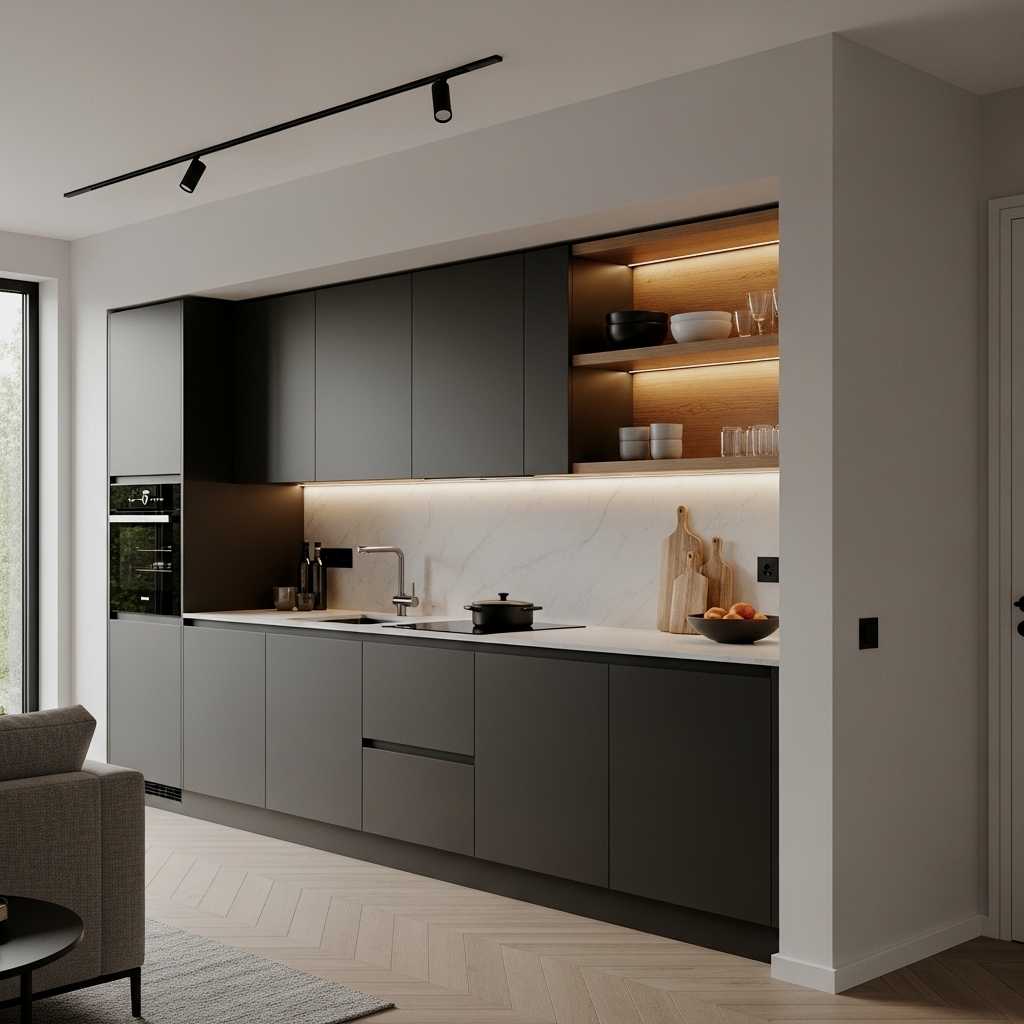
There is something so incredibly chic about a kitchen that looks like it was “carved” into the wall. By recessing your cabinetry into an alcove, you eliminate the bulky protrusion of upper cabinets into your open-plan living area. This layout is a best kept secret for making a small space feel architectural. To pull this off, I recommend painting the entire alcove—cabinets, walls, and trim—in a single sophisticated shade like Farrow & Ball ‘Setting Plaster’. The lack of visual contrast makes the boundaries of the kitchen disappear.
The Multi-Functional Island Hub
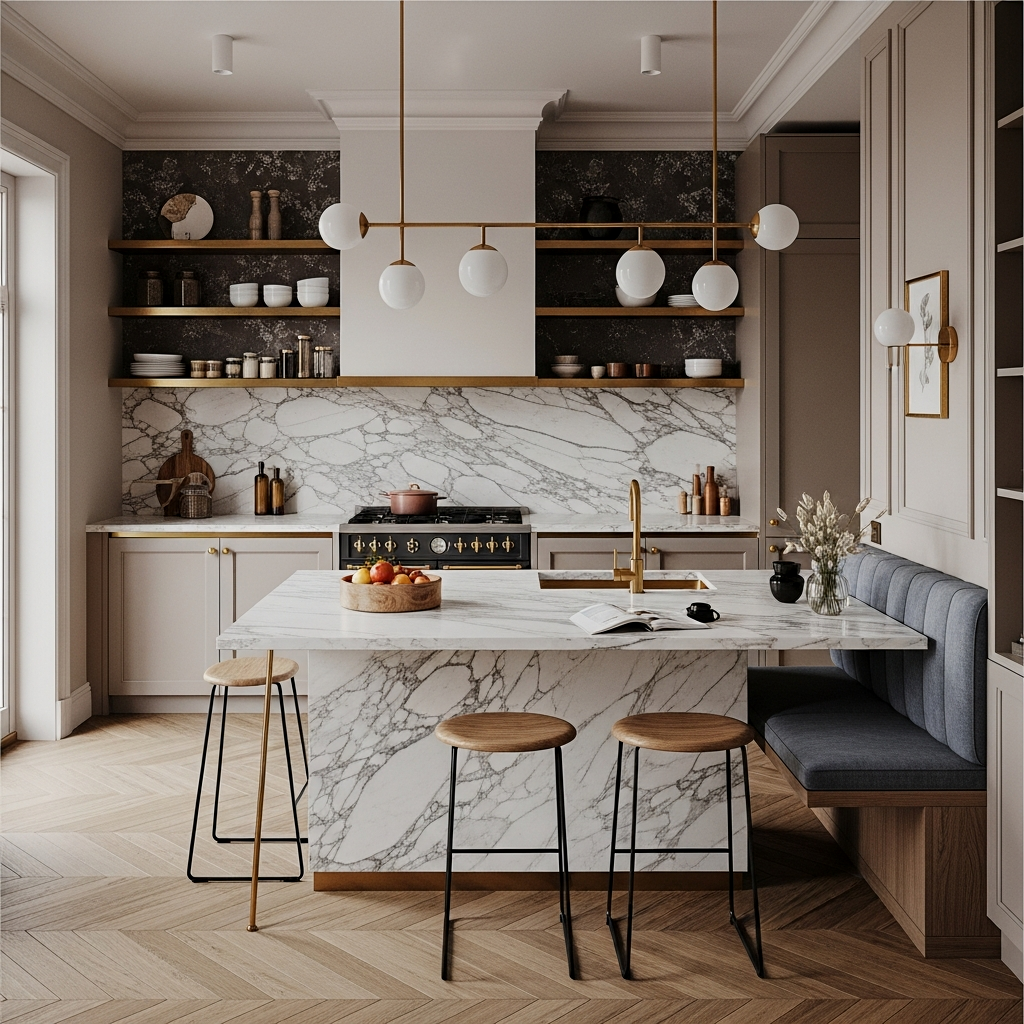
When you have zero room for a dining table AND an island, you make the island do both. Trust me on this one: a “T-shaped” or tiered island is life-changing. You have a standard-height prep area on one side and a lower, table-height extension on the other. It keeps the kitchen feeling like a “hub” rather than just a utility zone. I love using a slim, mobile island like the Crate & Barrel ‘Sheridan’ kitchen island if you need the flexibility to move it when you have a big group over.
Install a set of Philips Hue light strips under the island’s overhang. Setting them to a warm amber glow at night helps transition the space from ‘work mode’ to ‘relax mode’.
Maintain “Visual Continuity” by matching your kitchen hardware—think solid brass pulls from Rejuvenation—to the metal finishes in your living room lighting. It bridges the two zones instantly.
The Fluid L-Shape Corner
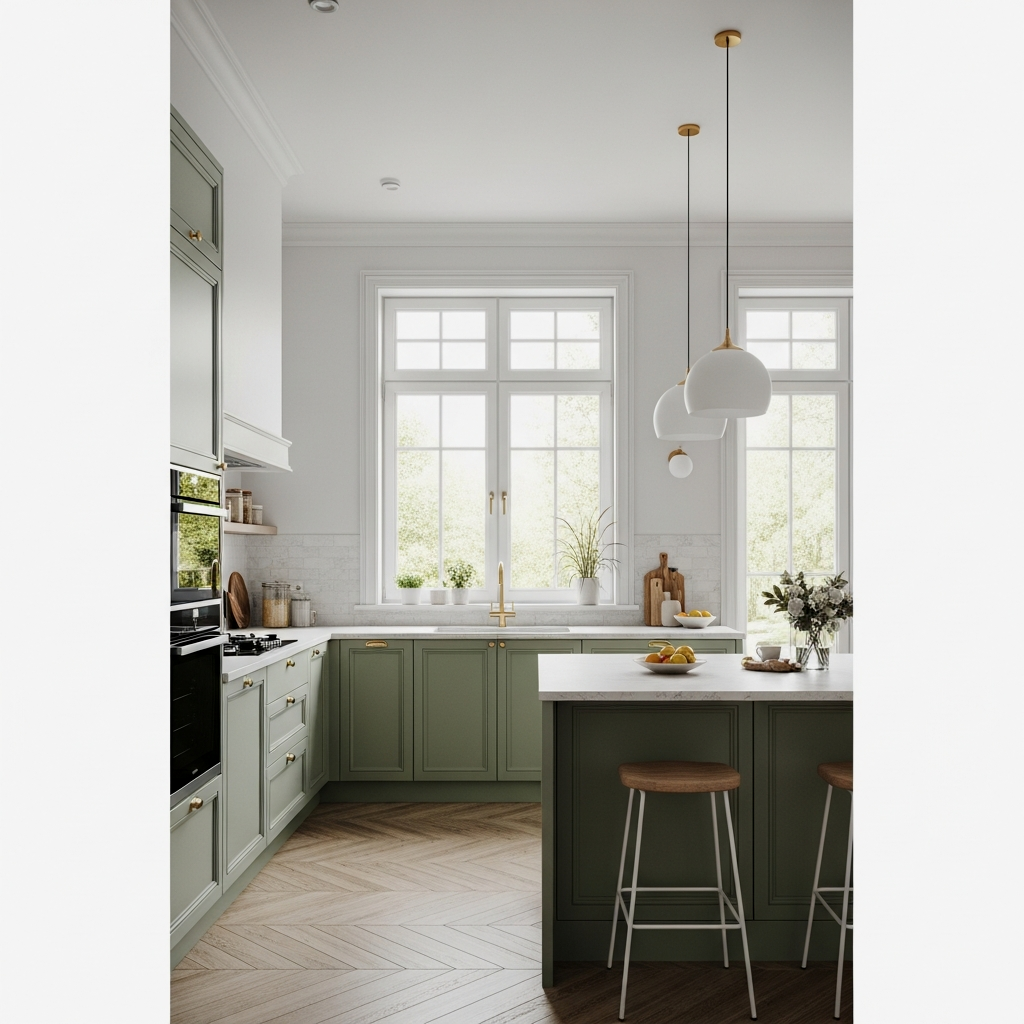
The L-shape is the gold standard for small open plans because it hugs the walls and leaves the center of the room completely open. To keep it from looking “heavy,” skip the upper cabinets on one side and replace them with thick, floating wood shelves. It creates such a breezy, curated vibe. No seriously, the difference in airiness is unreal. I’m a huge fan of the LeMans pull-out trays for those awkward corner cabinets—they ensure no pot or pan is ever lost in the “abyss” again.
Style your floating shelves with ‘functional decor’—think a stack of beautiful cookbooks and a ceramic French press—so they don’t just look like storage, but a curated display.
The Floating Floor Concept
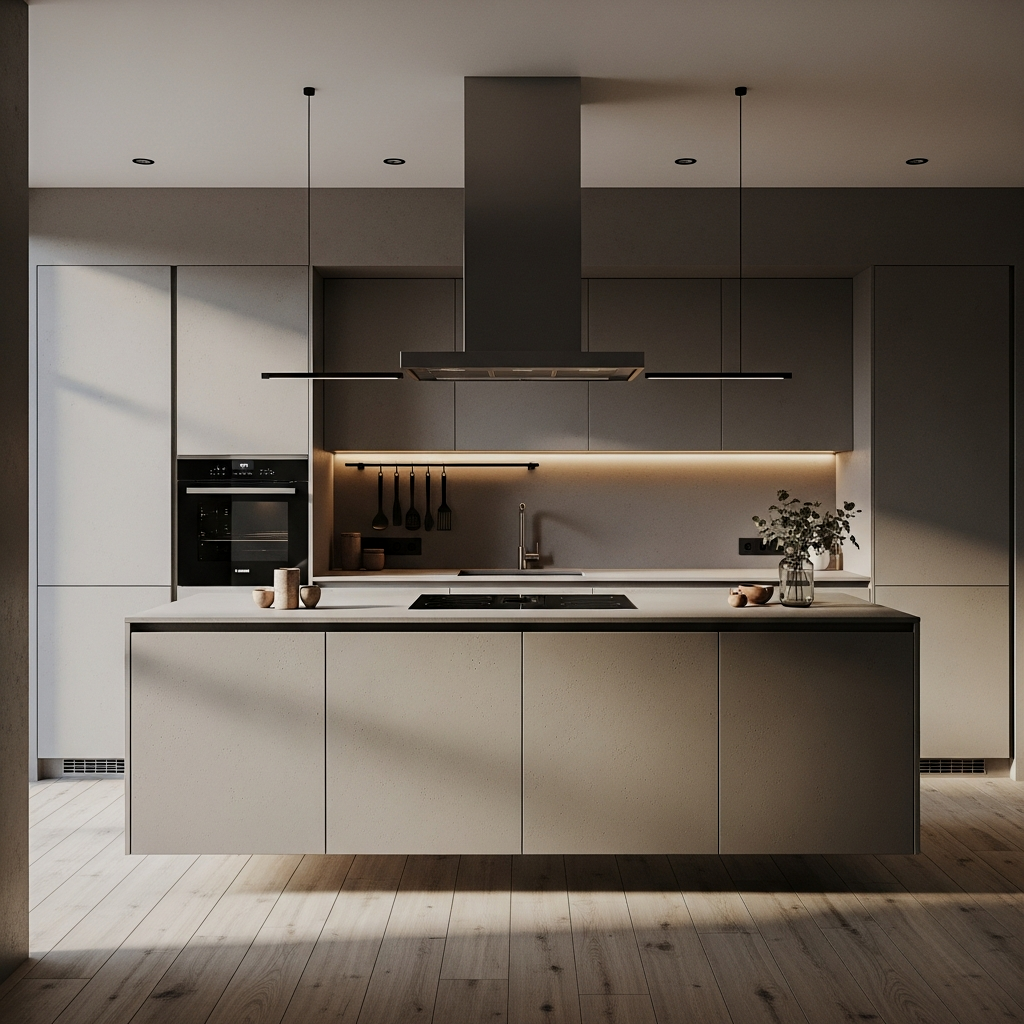
If you want to make your kitchen feel lighter than air, go for wall-mounted lower cabinets. This “floating” look exposes more of the floor, which tricks your brain into thinking the room is much larger. It’s a very high-end, European aesthetic that works beautifully in modern apartments. You can achieve this with the IKEA Sektion system if you use a heavy-duty wall rail, but just make sure your plumbing is tucked neatly behind the wall. Finish the look with a slim-profile Fisher & Paykel integrated dishwasher to keep the lines clean.
The Glass-Partitioned Zone
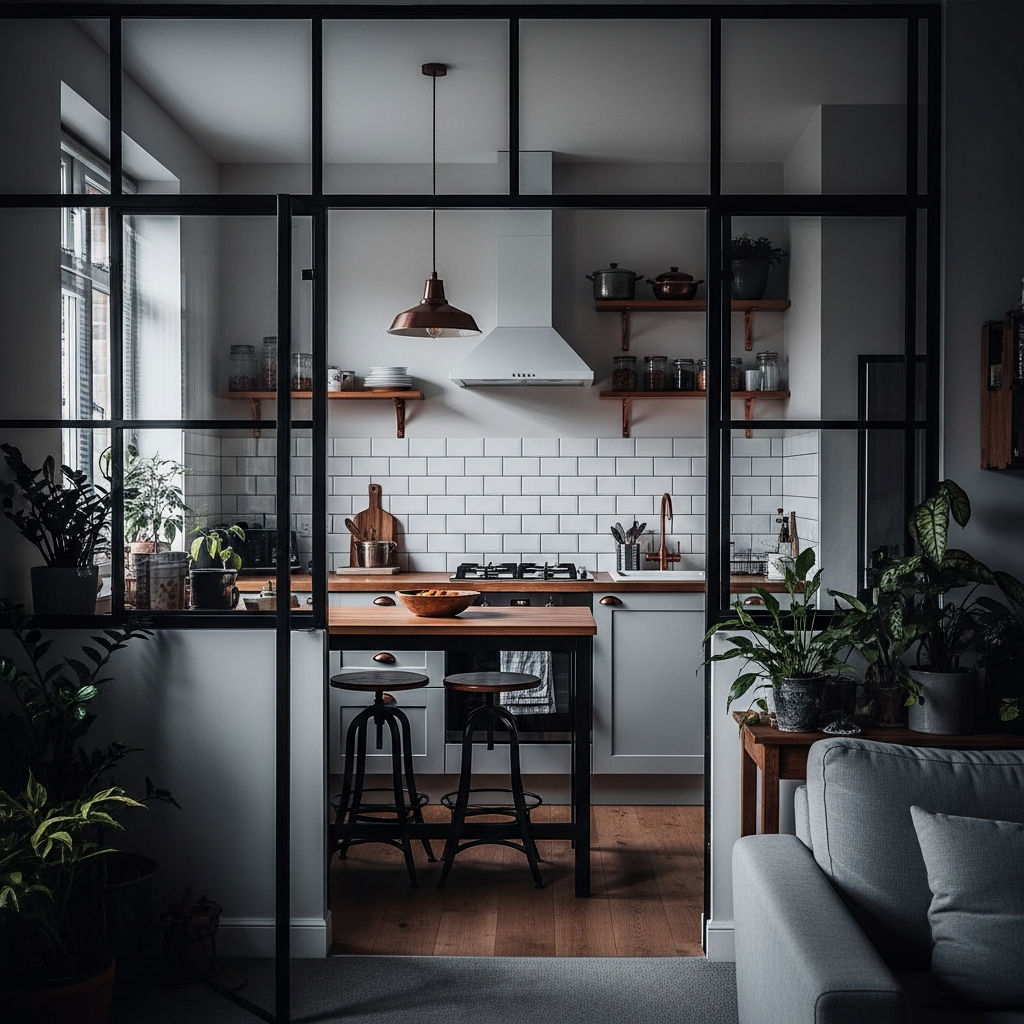
Sometimes you want the open feel without the smells of sautéed onions hitting your sofa. A glass partition—especially one with a black steel “Crittall” frame—is the ultimate solution. It acts as a physical barrier but a visual bridge. It is genuinely life-changing for zoning a studio apartment. For a softer look, use reeded glass; it blurs the “mess” of the kitchen while still letting every drop of sunlight through to the living area.
If a custom glass wall is out of budget, use a tall, black-framed arched floor mirror placed opposite the kitchen to mimic the look of an architectural window.
The Vertical Storage Wall
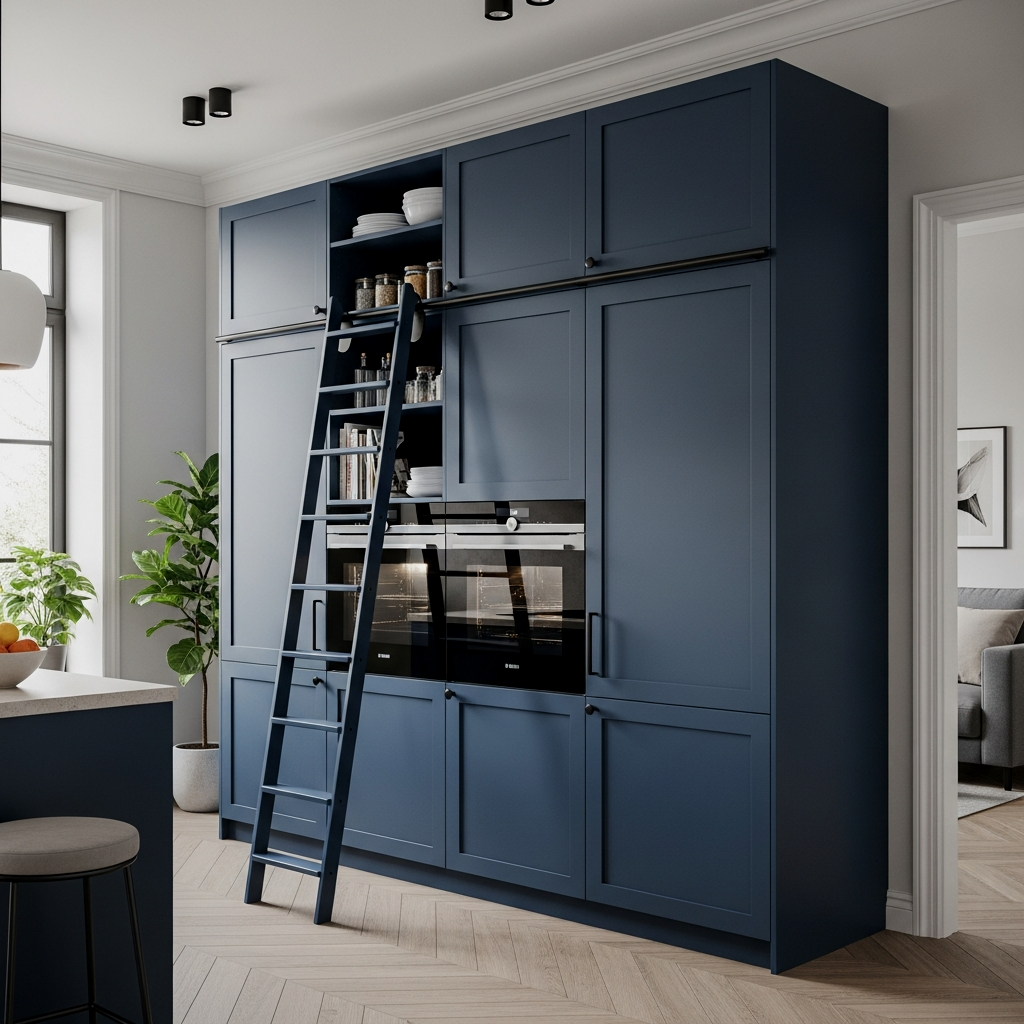
In a small open plan, every inch of vertical space is prime real estate. I’m talking floor-to-ceiling cabinets on a single wall. By concentrating all your storage in one “mega-unit,” you can keep the rest of the kitchen area minimal. Use push-to-open doors with no handles for a “hidden” look. I love the Benjamin Moore ‘Chantilly Lace’ for this; it’s the perfect crisp white that makes a massive wall of cabinets feel like a clean, bright backdrop rather than a looming monolith.
The exact pieces that make these ideas work:
The Tiered Countertop System
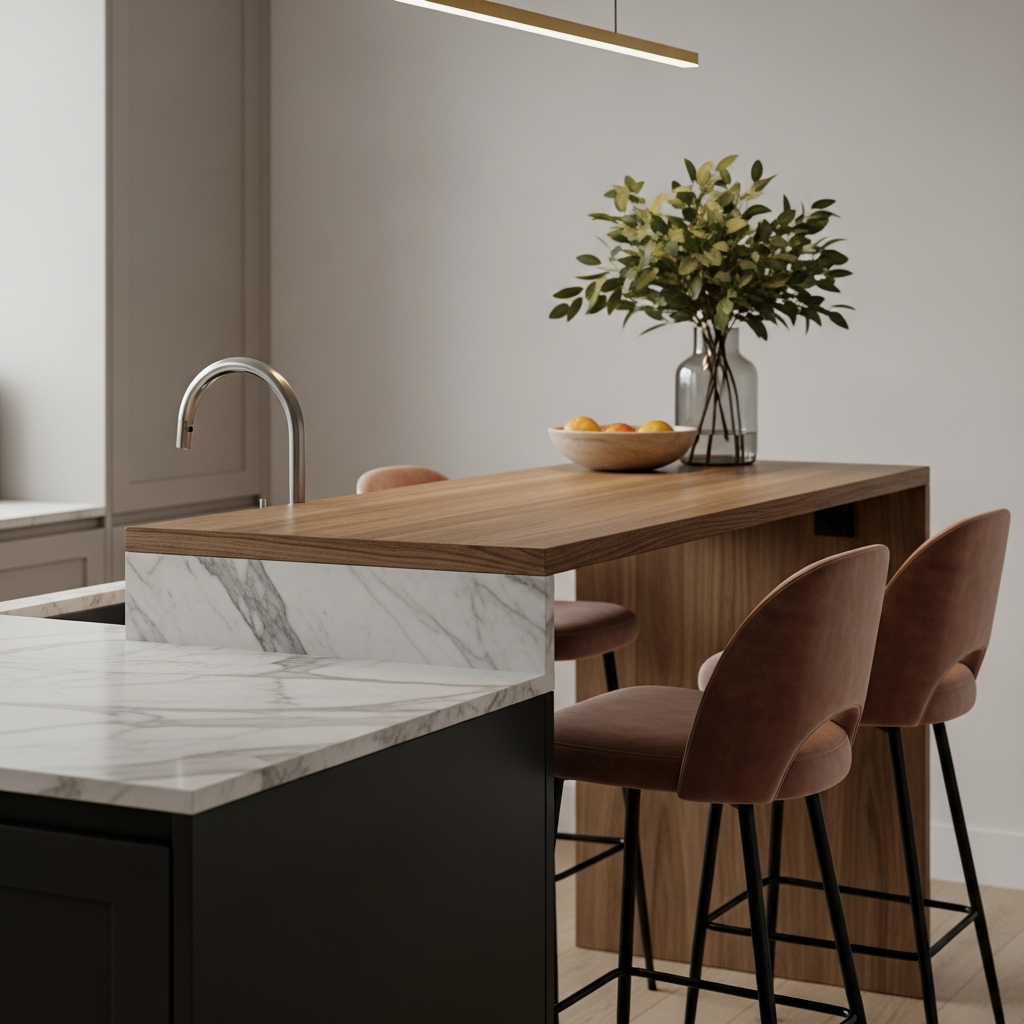
This layout is all about creating levels. By having a slightly higher “backsplash” wall that hides the sink from the living area, you can mask the inevitable pile of dishes. It’s a genius way to maintain an open feel while keeping the “utility” part of the kitchen out of sight. I’ve seen this done beautifully with a solid brass plate used as the riser—it adds such a stunning, reflective warmth to the room. It’s the best kept secret for people who love to entertain but don’t want to clean as they go.
Use the ‘riser’ part of your tiered counter to house your power outlets, keeping your main backsplash tile clean and uninterrupted.
The Mirrored Expansion Trick
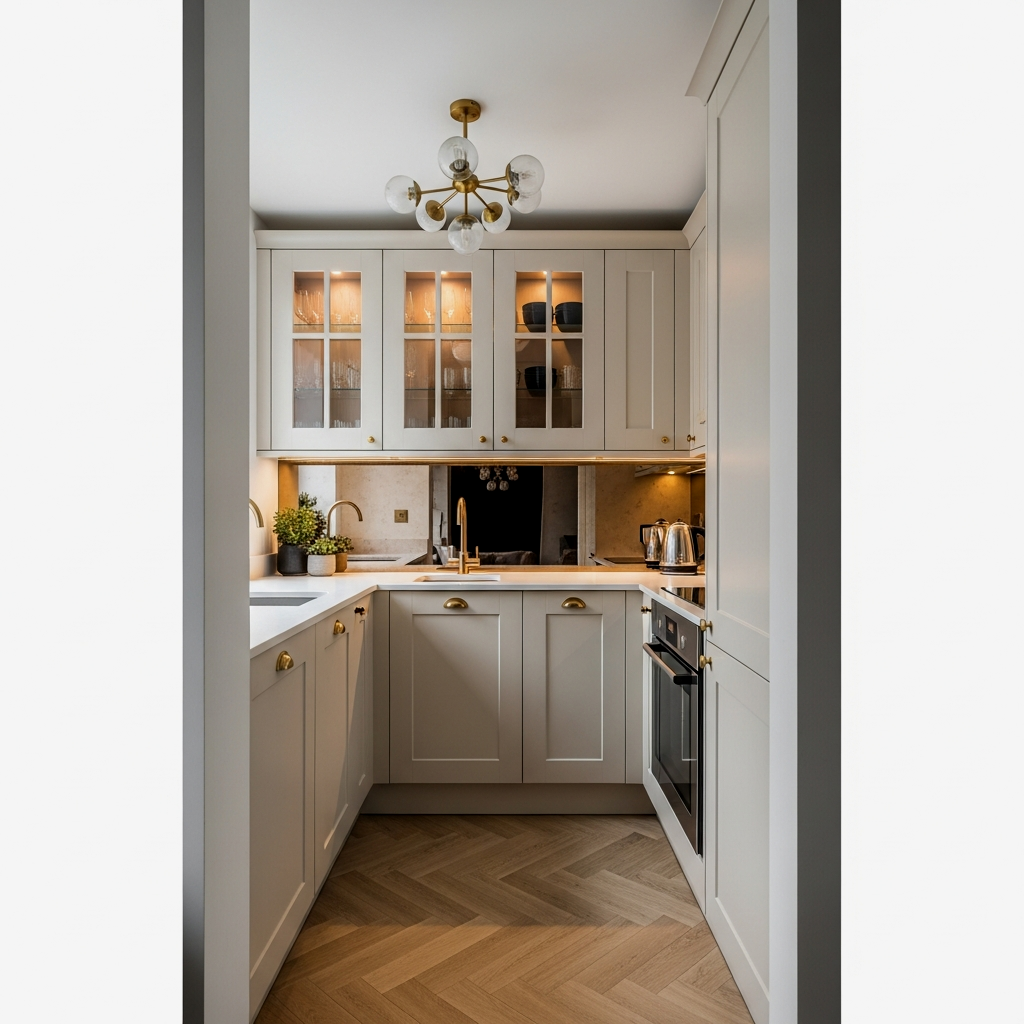
I am genuinely obsessed with using mirrors in the kitchen. Not just a small mirror, but an entire antiqued mirror backsplash. It reflects the living area and the light from the windows, making the kitchen footprint feel twice as large. Because the glass is antiqued, it’s actually very forgiving with splashes and steam. If you pair this with a deep, moody cabinet color like Farrow & Ball ‘Hague Blue’, the result is pure luxury. It turns a tiny corner into a high-end “jewelry box” of a kitchen.
Clean your mirrored backsplash with a mix of water and white vinegar to keep it streak-free without harsh chemicals near your food prep area.
The Single-Wall Statement
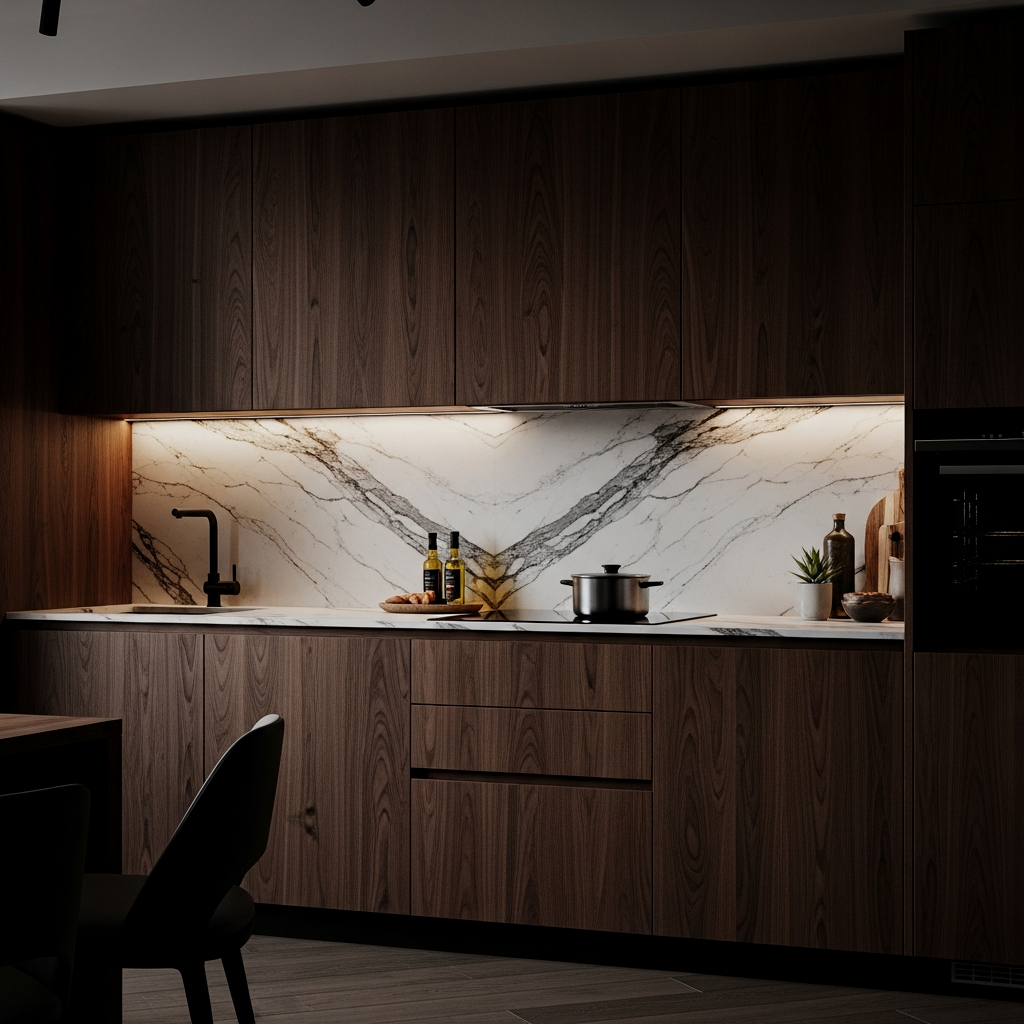
In a very narrow open-plan space, sometimes the best layout is to keep everything on one single wall. To make this look intentional rather than an afterthought, use a dramatic material for the entire wall. Think floor-to-ceiling boucle-textured wallpaper (away from the stove!) or a stunning book-matched stone. By treating the kitchen as a “piece of furniture” against the wall, you leave the rest of the floor completely free for your sofa and dining area. It’s the ultimate minimalist move.
For a single-wall layout, integrate your fridge with a matching cabinet panel. Seeing a big stainless steel box breaks the ‘statement’ wall vibe you’re going for.
The Under-Stair Integration
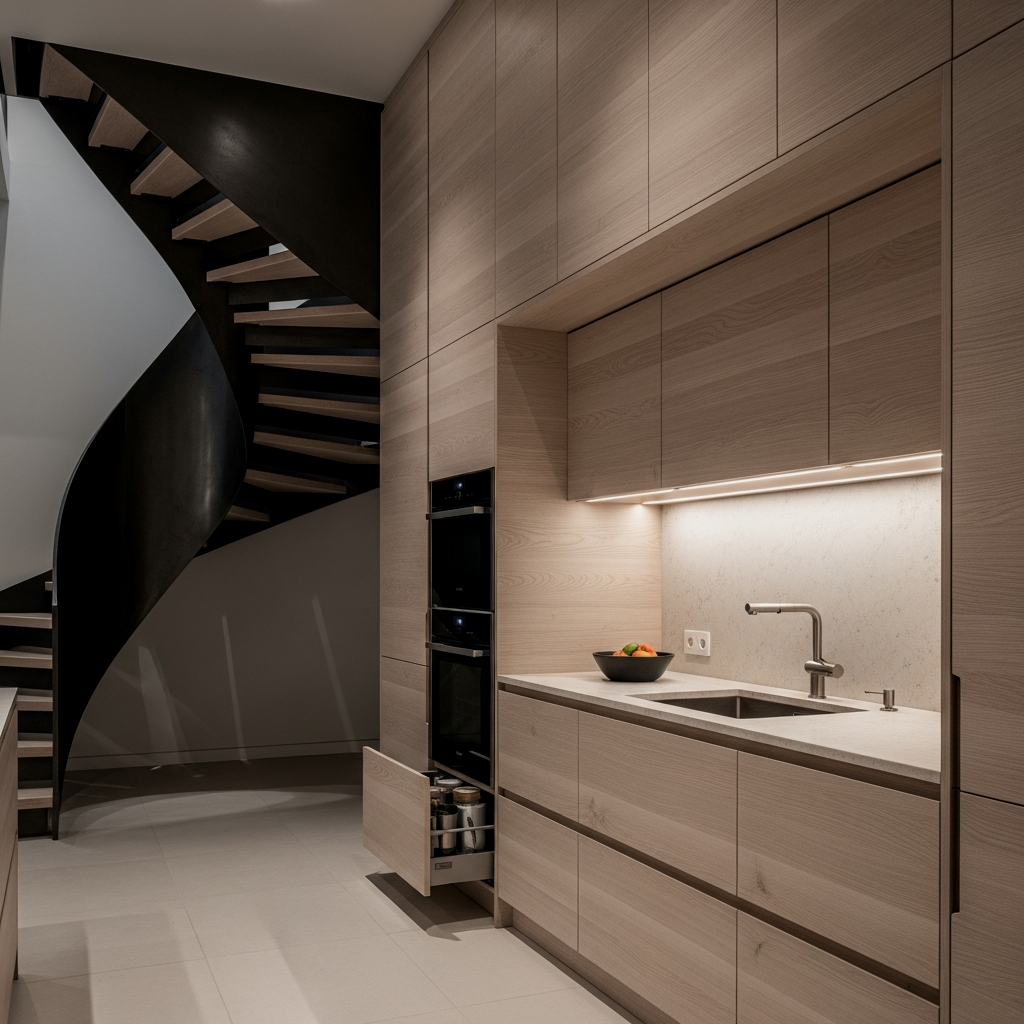
If you have stairs in your open-plan living area, you’ve got a goldmine of unused space. Tucking the fridge or a pantry under the stairs is a total game-changer. It frees up the main kitchen area for more counter space. I’ve seen some incredible designs where the oven and a wine fridge are built directly into the stair stringer. It looks so custom and makes every square inch work for its living. Just ensure you have a pro contractor check the structural support before you start hacking away!
When integrating appliances into tight spots like under-stairs, always choose ‘zero-clearance’ hinges. Brands like Liebherr make these, and they allow the doors to open fully even when they are flush against a wall or cabinet side.
📏 12 Small Open Plan Kitchen Layouts That Are Genuinely Life-Changing—No Seriously Quick-Win Checklist
- Measure Twice: Ensure you have at least 36 inches of walkway space between any counter and furniture.
- Integrated Appliances: Hide the fridge and dishwasher behind cabinet panels to maintain the “living room” aesthetic.
- Lighting Layers: Combine task lighting (LED strips) with ambient lighting (pendants) to define the zones.
- Hardware Harmony: Use the same metal finish throughout the open-plan area to unify the design.
- Verticality: Take cabinets all the way to the ceiling to maximize storage and draw the eye upward.
The Window-Seat Extension
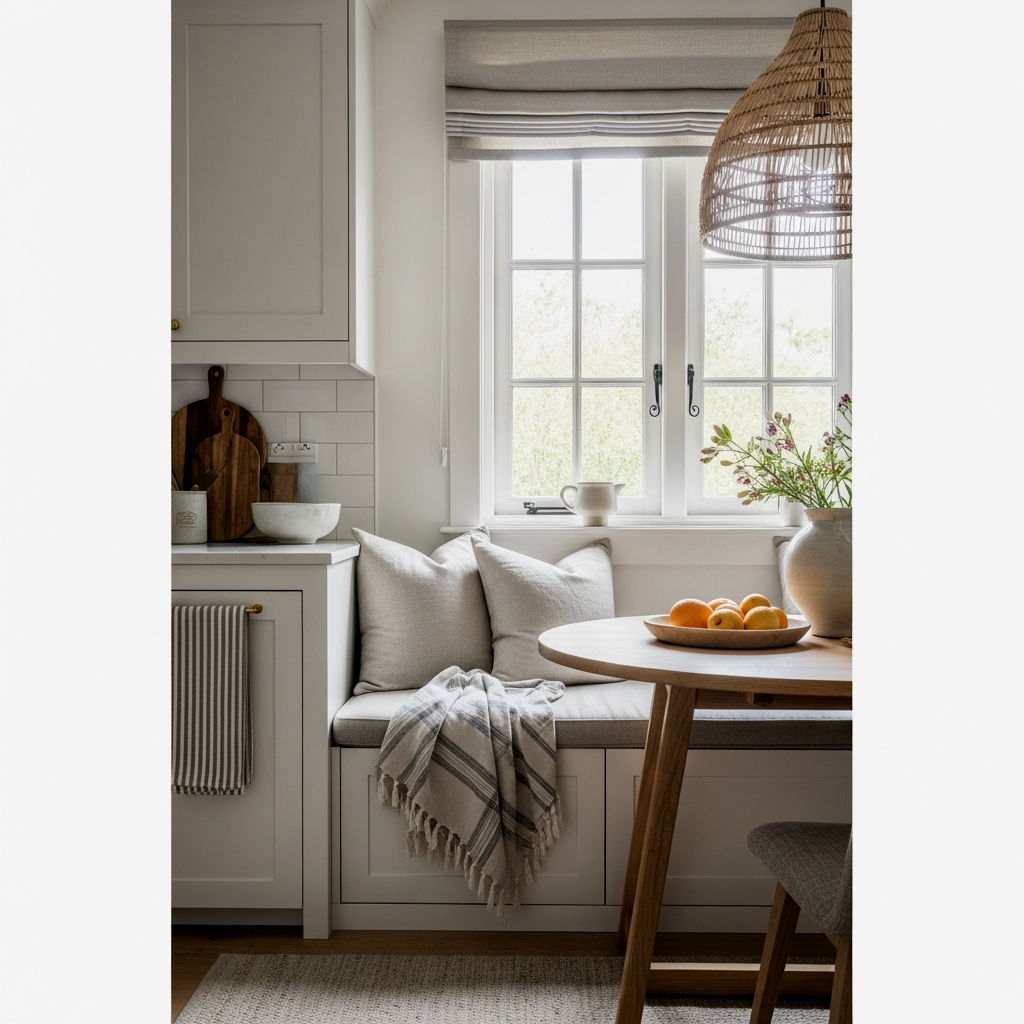
My absolute favorite way to blend a small kitchen into an open plan is to extend the countertop into a window seat. It’s genuinely life-changing for the “vibe” of the room. You can be prepping dinner while your partner sits right next to you on the built-in bench. Use the same cabinetry for the bench base as you do for the kitchen to make it feel like one continuous piece of custom joinery. Throw on some linen cushions and you’ve created the coziest spot in the house without adding a single extra foot of space.
I know how overwhelming it can feel when you’re staring at a tiny floor plan, but I promise you, these layout shifts are the answer. It’s not about having the biggest kitchen on the block; it’s about having the one that flows perfectly with your life. Take it one zone at a time, trust your gut on the materials, and you’ll be amazed at how much you can actually do with a “small” space. You’ve got this!
Frequently Asked Questions
Can I have an island in a very small open-plan kitchen?
Yes, but the key is the “clearance zone.” You need at least 36-42 inches around all sides for it to be functional. If you don’t have that, a mobile island or a “skinny” 24-inch island is a much better alternative that won’t choke the flow of the room.
How do I stop my open-plan kitchen from looking like a “messy” kitchen?
The best trick is to use integrated appliances and “hidden” storage. When the fridge and dishwasher match the cabinetry, the kitchen looks more like a wall of furniture. Also, a tiered countertop can hide the sink and dirty dishes from the living area view.
What is the best flooring for a small open-plan kitchen and living area?
To make the space feel larger, use the same flooring throughout both zones. Engineered hardwood or high-quality LVP (luxury vinyl plank) is perfect because it’s durable enough for kitchen spills but warm enough for a cozy living room feel. Avoid “breaking” the floor with different materials.
Are upper cabinets a mistake in a small space?
Not necessarily, but they can make a room feel “top-heavy.” A great compromise is to use uppers on only one wall, or use glass-front doors. Floating shelves are the most “open” option, but they require you to be more organized with your styling.
What paint finish should I use for a kitchen that flows into a living room?
Use a “Scuff-X” or a high-quality washable matte finish. This gives you the sophisticated, non-reflective look of a living room wall but the durability and “wipeability” you need for a kitchen environment. It keeps the transition completely seamless.