✂️ Build a Solid Pallet Wood Dining Table for Under $100
Stop overpaying for mass-produced rustic furniture that lacks character. You can build a custom, heavy-duty dining table using heat-treated pallets and a few basic tools for less than a hundred bucks.
1. Source and Prep the Pallets
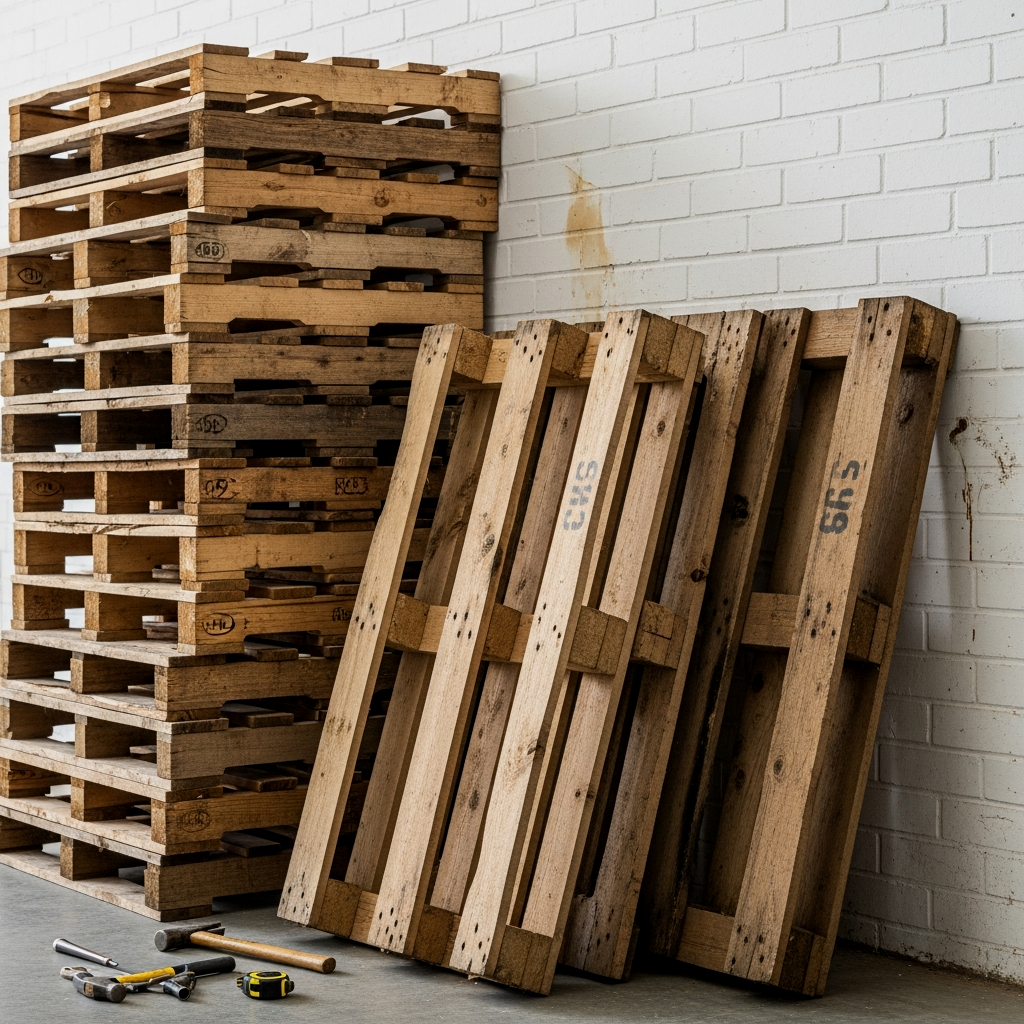
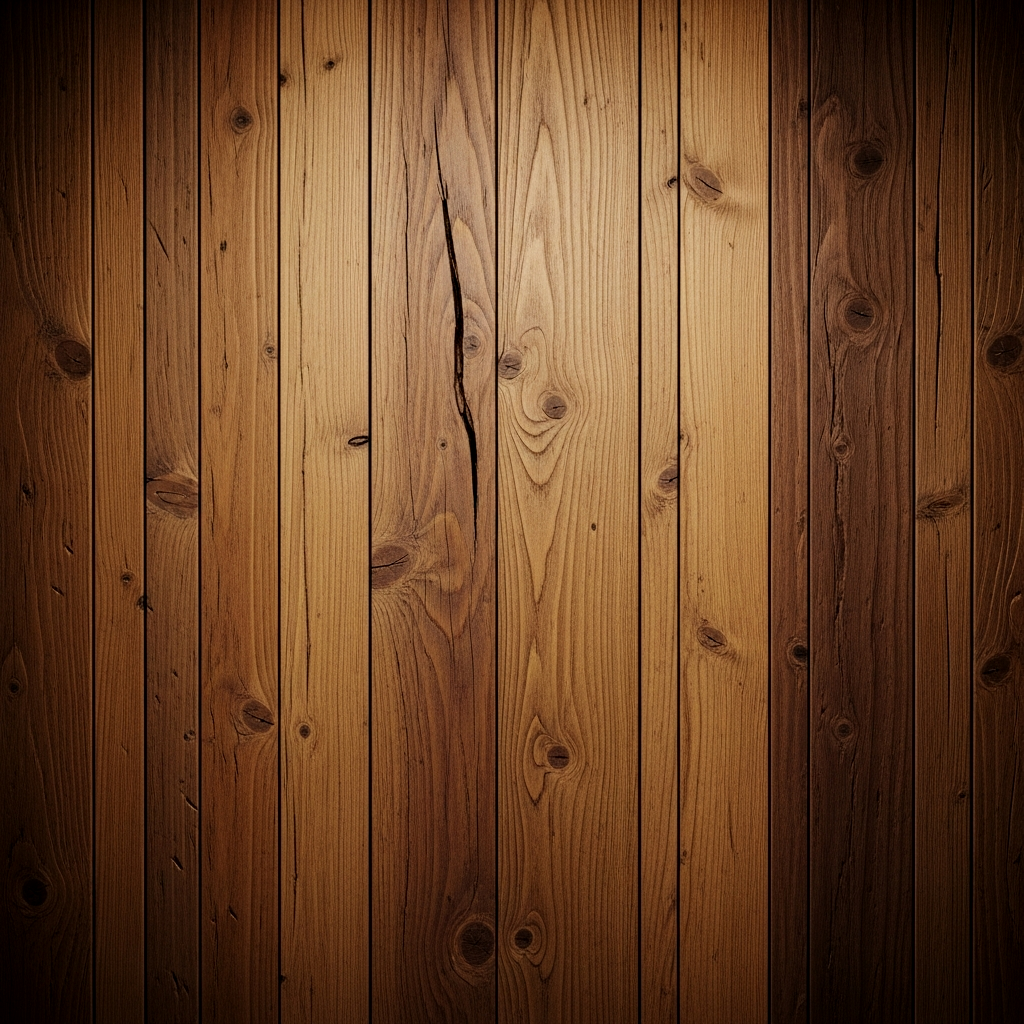
Finding the right wood is the most important part of this build. Look for the ‘HT’ (Heat Treated) stamp on the side of the pallet and avoid anything marked ‘MB,’ which indicates toxic chemical treatments. Common Mistake: Using dirty, oil-stained pallets that will ruin your finish later.
- Locate 3-4 clean heat-treated pallets from local warehouses or hardware stores
- Use a crowbar and hammer to carefully pry the planks from the frame
- Remove all old nails using the claw end of your hammer or pliers
Use a specialized ‘Pallet Buster’ tool from Amazon to pop boards off in seconds without splitting the wood.
2. Sand the Rough Planks
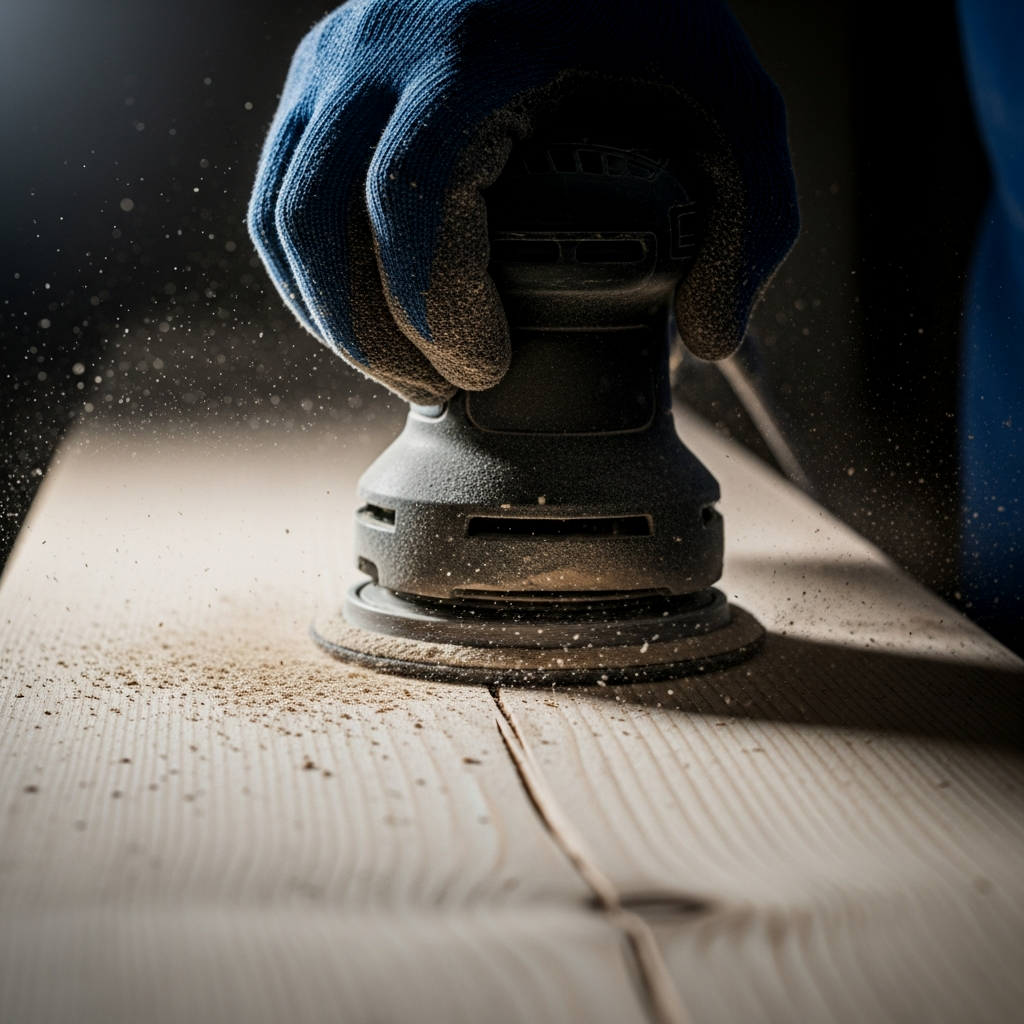
Nobody wants a splinter during dinner. Raw pallet wood is notoriously rough, so you need to sand it down to a smooth, touchable surface without losing that rugged character.
- Start with a heavy 60-grit sandpaper to level out the high spots
- Move to 120-grit for a smoother feel across the entire surface
- Wipe down all boards with a tack cloth to remove every spec of dust
Use a DEWALT Random Orbit Sander for the fastest results; manual sanding will take you three times as long.
3. Assemble the Tabletop
Lay your best boards side-by-side to create a surface that is roughly 36 inches wide. You want to mix the grain patterns and wood tones to give it that high-end reclaimed look.
- Arrange planks on a flat floor to find the best visual fit
- Cut three ‘cleats’ (support boards) from the pallet frame to the width of your table
- Glue and screw the planks into the cleats from the underside to hide the fasteners
Apply Titebond III Ultimate Wood Glue between the edges of the planks for a waterproof, rock-solid bond.
4. Install Modern Hairpin Legs
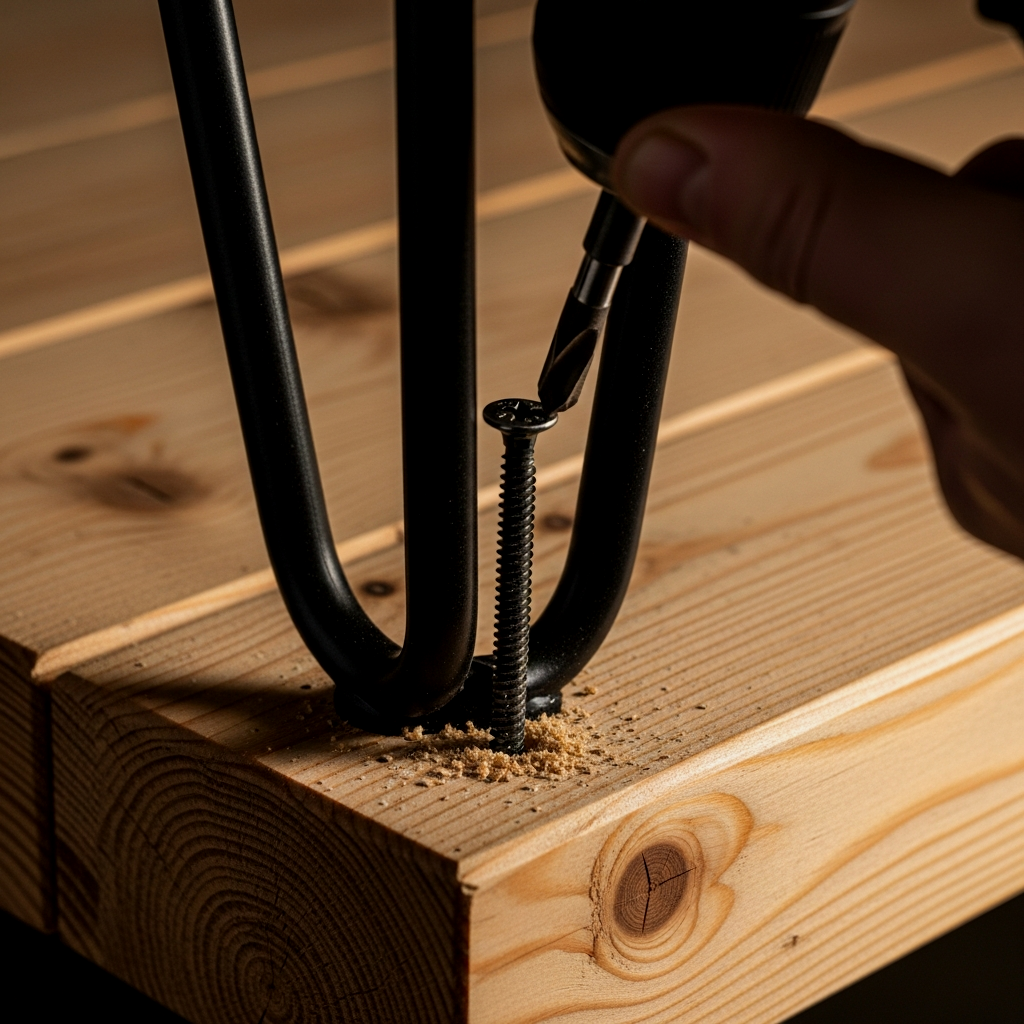
To keep this project renter-friendly and easy to move, we’re using steel hairpin legs. Common Mistake: Forgetting to pre-drill pilot holes. If you drive screws directly into old pallet wood, it will likely split and ruin your structure.
- Flip the tabletop over so the underside is facing up
- Mark the four corner positions for your legs, roughly 2 inches from the edges
- Drill pilot holes and screw the legs securely into the corner cleats
Buy a set of 28-inch black steel hairpin legs from Amazon; they are affordable and give the table an instant mid-century modern vibe.
5. Seal and Protect the Wood
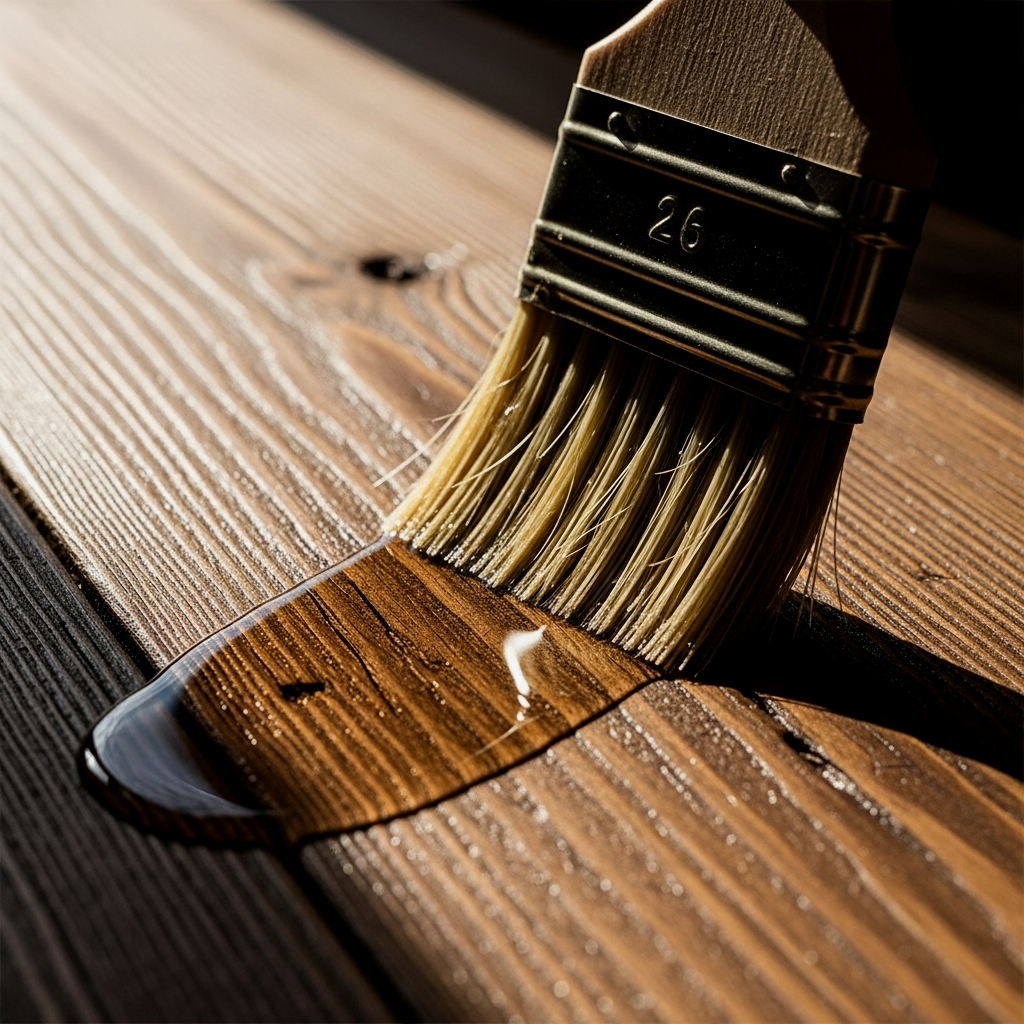
Dining tables take a beating from spills and heat. A good sealer protects the wood while making it easy to wipe down after a meal.
- Apply a coat of pre-stain wood conditioner if you plan on using a dark stain
- Brush on two coats of water-based polyurethane for a durable finish
- Lightly sand with 220-grit paper between coats for a professional feel
Use Minwax Polycrylic in a ‘Matte’ finish to protect the wood without making it look like cheap, shiny plastic.
6. Style for the Dining Room
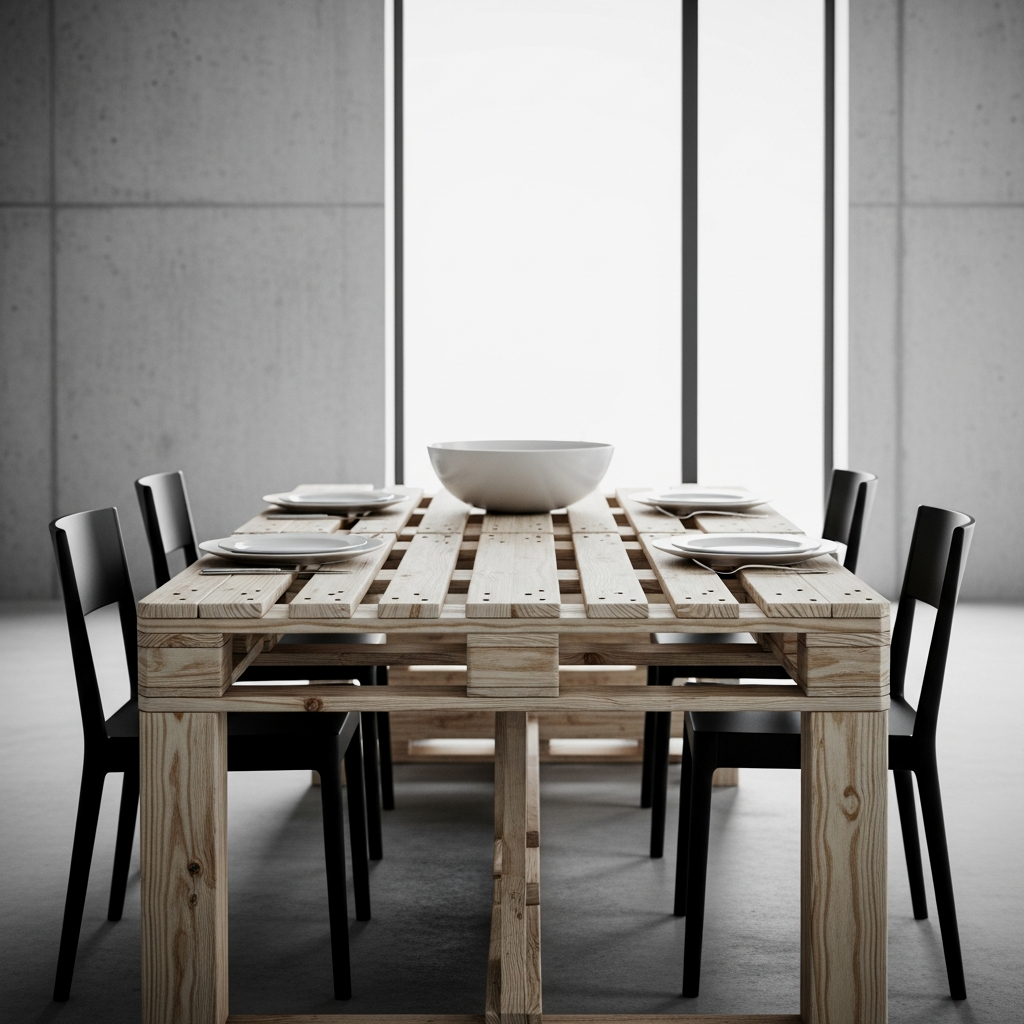
The contrast between the rugged pallet wood and clean modern decor is what makes this work. Keep the surrounding area simple so the table remains the focal point of the room.
- Pair the table with simple black or white molded plastic chairs
- Add a low-profile centerpiece like a ceramic bowl or a few succulents
- Use linen placemats to soften the industrial look of the wood
IKEA’s ODGER chairs in anthracite grey look incredible next to the warm tones of reclaimed pallet wood.
🛒 Your Shopping List
- 3-4 HT-Stamped Wooden Pallets (Free to $10)
- 28-inch Steel Hairpin Legs (Amazon – $45)
- Titebond III Wood Glue ($10)
- 1.25-inch Wood Screws ($8)
- Minwax Polycrylic Matte Finish ($15)
- Assorted Sandpaper Grits ($10)
⚠️ Common Mistakes to Avoid
- Using ‘MB’ marked pallets which contain harmful pesticides.
- Skipping the pilot holes, causing the dry pallet wood to crack during assembly.
- Not leveling the planks, leading to a table surface where glasses tip over.
- Using oil-based stains without a conditioner, resulting in a blotchy, uneven look.
The result is a sturdy, character-filled dining table that looks like a high-end boutique find. The industrial steel legs and weathered wood grain create a perfect balance of modern and rustic styles.
Quick-Win Checklist
- Step 1: Secure 4 HT-stamped pallets and remove all hardware.
- Step 2: Sand all planks until smooth to the touch.
- Step 3: Glue and screw planks together to form a solid tabletop.
- Step 4: Secure four 28-inch legs to the underside of the table.
- Step 5: Apply two coats of sealer and let dry for 24 hours.
- Step 6: Style with simple chairs and a minimal centerpiece.