🛠️ Practical Ways to Block Outside Noise for a Peaceful Home
Oh, my heart just sank the other day. A dear friend who recently moved into a charming new flat over in the UK sent me the most dreadful video—right at 7:00 AM on a weekday, the pub downstairs was already tossing and clattering heavy metal canisters. He tried to be so brave about it, telling me, “I’ve got some great earplugs, I’ll get used to the noise.”
Bless his heart, but I knew immediately he wasn’t going to get a wink of proper, restorative sleep. And as we all know, a home’s peace isn’t just about the nights, is it? Constant noise steals your joy when you have friends over for dinner, and it absolutely ruins the chance to curl up with a good book in your favorite nook.
I just couldn’t let him settle for a life of wearing earplugs in his own living room. So, I rolled up my sleeves and set out to find a real, practical solution. I wanted to figure out exactly how we could properly soundproof his space for under $150— and without a single major renovation. Here is what I found…
1. Conduct a Sound Leak Audit

Before we pick up a single tool, we need to listen closely to where the noise is sneaking in. Often, it’s not the walls themselves, but the tiny gaps around windows and doors that let the racket through.
- Close all interior doors and turn off noisy appliances
- Walk slowly around the perimeter of the room listening for ‘hot spots’
- Use a lit incense stick near window frames to see where the smoke flickers, indicating an air and sound leak
Use the ‘flashlight test’ at night—have someone stand outside with a bright light while you look for slivers of light coming through door frames inside.
2. Seal the Cracks with Acoustic Caulk

Air is the primary carrier for sound, my dear, so if air can get in, so can the noise. Sealing these tiny fissures with a specialized sealant makes a world of difference for your peace of mind.
- Clean the area around window trim and baseboards with a damp microfiber cloth
- Cut the tip of the acoustic sealant tube at a 45-degree angle for precision
- Apply a steady bead of sealant along any visible gaps where the trim meets the wall
Don’t use standard bathroom caulk; choose ‘Big Stretch’ by Sashco because it stays flexible and won’t crack when your house settles, keeping the seal airtight for years.
3. Install High-Density Weatherstripping

Windows and doors are the most common culprits for letting in that unwanted hum. Adding a fresh, thick seal around the edges acts like a warm hug for your home, keeping the noise right where it belongs—outside.
- Measure the perimeter of your window sash and door frames carefully
- Clean the surface with rubbing alcohol to ensure a strong adhesive bond
- Press the adhesive side of the rubber weatherstripping firmly into the track
Opt for EPDM rubber ‘D-profile’ stripping from 3M—it compresses better and lasts much longer than the cheap foam varieties that flatten out over time.
4. Layer with Heavyweight Acoustic Curtains

Now that we’ve sealed the air leaks, we need to add ‘mass’ to block those vibrations. A thick, beautiful set of curtains acts as a soft shield for your windows against the outside world.
- Install a sturdy curtain rod that extends at least 6 inches past each side of the window frame
- Choose curtains labeled as ‘blackout’ or ‘acoustic’ with at least three layers of fabric
- Ensure the curtains reach from the ceiling to the floor to prevent sound from ‘leaking’ over the top
Look for curtains weighing at least 3-4 pounds per panel; NICETOWN Blackout Curtains are a wonderful, affordable choice for adding the necessary weight.
5. Apply a Heavy-Duty Door Sweep
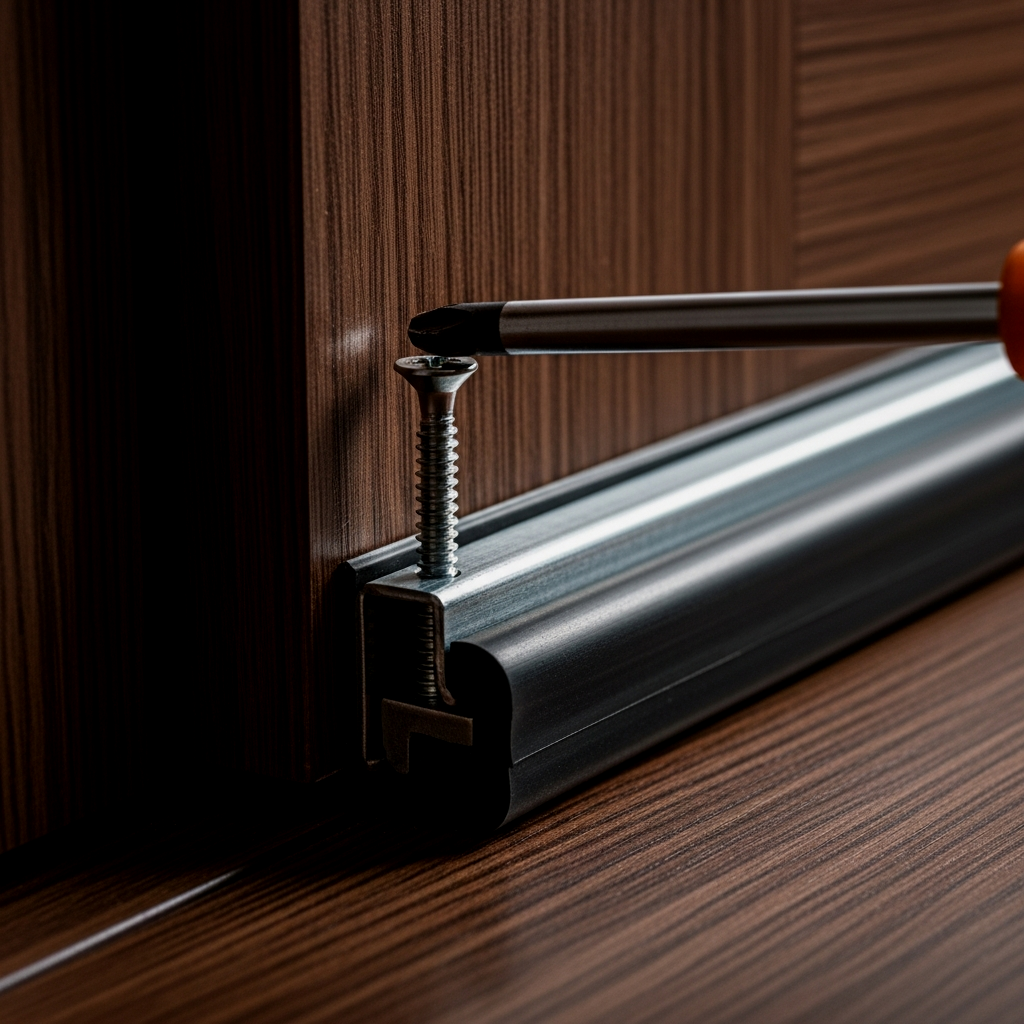
The gap at the bottom of your front or bedroom door is like an open invitation for street noise. A solid door sweep is the final touch to close off that last sound highway.
- Measure the width of the door while it is closed
- Trim the aluminum sweep housing with a hacksaw to fit the exact width
- Screw the sweep into the bottom of the door so the rubber just barely touches the floor
If you’re in a rental, use a twin-draft stopper like the ‘MAXY Home’ brand that slides under the door; it provides a great dual-layer seal without any drilling.
6. Dampen Interior Echoes

Once the outside noise is dampened, we want to make sure the sounds inside don’t bounce around and feel loud. Soft surfaces are your best friend here, creating a cozy and quiet atmosphere.
- Place a thick wool rug with a felt pad underneath to absorb floor vibrations
- Arrange a bookshelf filled with books against the wall that faces the noise source
- Hang a decorative fabric tapestry or acoustic panels disguised as art to break up flat wall surfaces
A 1/2-inch thick felt rug pad from RugPadUSA adds significant mass to the floor and absorbs more sound than common rubber honeycomb pads.
7. Final Check and Cleanup

You’ve done such a wonderful job, dear. Now, let’s tidy up and enjoy the silence you’ve created with your own two hands. It’s time for a quiet rest.
- Vacuum up any debris from drilling or trimming materials
- Wipe down all surfaces with a microfiber cloth to remove dust
- Sit quietly in the center of the room to confirm the noise reduction
Keep a small container of leftover acoustic caulk for ‘touch-ups’ after the house settles in a few months—houses breathe, and sometimes tiny gaps return.
🛒 Your Shopping List
- Sashco Big Stretch High-Performance Caulking
- 3M EPDM Rubber Weatherstripping (D-Profile)
- NICETOWN Heavyweight Acoustic Blackout Curtains
- Heavy-duty aluminum and rubber door sweep
- RugPadUSA 1/2-inch Felt Rug Pad
- Hacksaw (for trimming door sweep)
- Caulk gun
⚠️ Common Mistakes to Avoid
- Using lightweight foam weatherstripping; it doesn’t block sound well and fails quickly.
- Ignoring the gap under the door; sound behaves like water and will flow through any opening.
- Applying caulk to dirty surfaces; it won’t bond, and the air seal will break within weeks.
The room feels like a quiet, padded cocoon where the roar of traffic is reduced to a faint, distant whisper. Visually, the space looks plush and intentional with heavy drapes and soft textures that invite you to relax.
Quick-Win Checklist
- Step 1: Identify all air and sound leaks around windows and doors.
- Step 2: Apply flexible sealant to all window and baseboard gaps.
- Step 3: Replace old foam with high-density rubber weatherstripping.
- Step 4: Hang floor-to-ceiling weighted acoustic curtains.
- Step 5: Install a door sweep to eliminate the gap at the floor.
- Step 6: Add soft textiles and mass-heavy furniture to the room.
- Step 7: Clean the workspace and perform a final sound check.